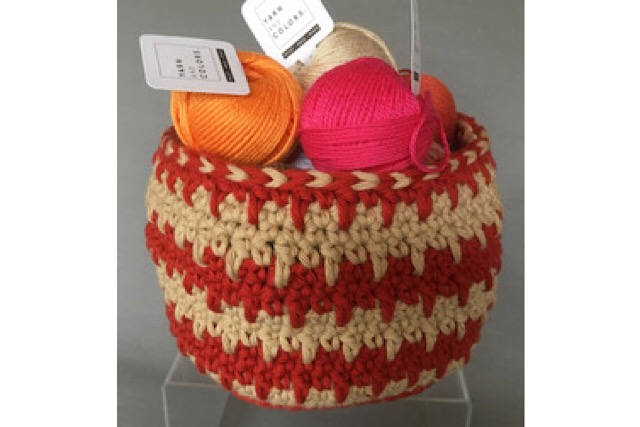
Epic Basket
Today's project is using Yarn and Colors Epic, a cotton yarn that has not been mercerized and is great for many different types of makes including toys, bags, table mats, cushion covers, baskets and many more. For my basket I chose the following colours Limestone 0009 and Red Wine 0030.

As there are so many free patterns and videos on crocheting a flat circle I won’t waste your time here on writing out the pattern for the base. I did use a size smaller hook than is recommended as a basket needs to be firm to hold its shape. I used the Limestone as my base colour.

The picture above shows the circle at 48 single crochet, I then went on to row 11 which gave me a total of 66sts. At this point you can start the sides of the basket like me or make your base a little bigger depending on what you want to use it for.
Now for the sides, working into the back loop only of the top of the single crochet on the previous row ( see photo below). Now work 1 single crochet on each stitch, giving a total of 66 single crochet.
Next row work 1 single crochet in each of the 66 stitches.

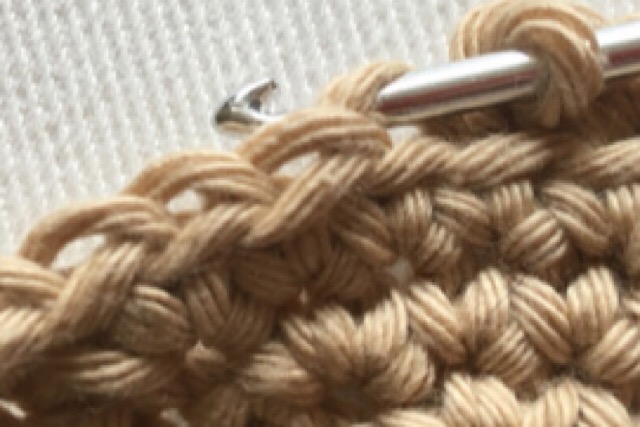
Now joining on your contrasting colour but not cutting the base colour work first row of pattern as follows.
1 chain to start, 1 single crochet in 1st single crochet of previous round, 1 double crochet in the gap of the 1st row of single crochet below, continue with 1 single crochet and 1 double crochet for the complete row.
The photo below shows how this should look.

At the end of each row bring the unworked colour up so as to not have any large loops at the back of the work.
Now work 2 rows of single crochet.
This forms a 3 row pattern and the colour yarn is then changed back to the base colour.Continue until you have achieved the size basket you require.
On my final red pattern I only did 1 row of single crochet before the edging but this is entirely up to you.
At this point my basket measured 10cm high.
Now for the top edging, using both colours alternatively work a row of slip stitch into the last row of single crochet as shown in the picture below.

Fasten off and weave in the ends. Now join the red wine yarn to the bottom edge and work a row of slip stitch into the front loop of the row where you started to work the wall of the basket.

Fasten off and weave in the ends.

And now you have a basket which you can use to fill with presents for family of friends, perhaps make a nest of 3 baskets in different sizes for storage in a craft room or on the shelf, add handles, use more colours ……….. the variations are endless.

You could even use the basket for keeping your next project neat and tidy!!

